Orthoimagery Data Discovery Application Help-Search and Download Data
- Map Navigation
- Tools
- Data Search and Download
Searching for Data
You can search for and discover the data you are interested in via several methods.
First, navigate the map to the general area of interest
Make sure the Discover dialog is visible. If it isn't, click the Discover button on the left side of the toolbar:
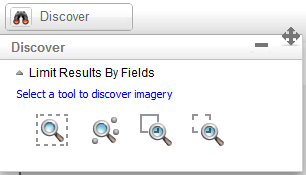
There are several search tools available, displayed across the bottom of the Discover dialog box. From left to right they are:
- Search in Current Extent
 find data within the current map extent
 - Search at a Point
 Find data by clicking on the map
 - Search by Rectangle
 Draw a rectangle on the map to search data within that rectangle
 - Search by Bounds
 Enter coordinates (lower left/upper right) for the area to be searched
Using any of the methods above will return all of the records found within your search area in a table, which will open at the bottom of the screen. The selected data will also be highlighted on the map view. The results window can be expanded or hidden by clicking the top bar of the window:
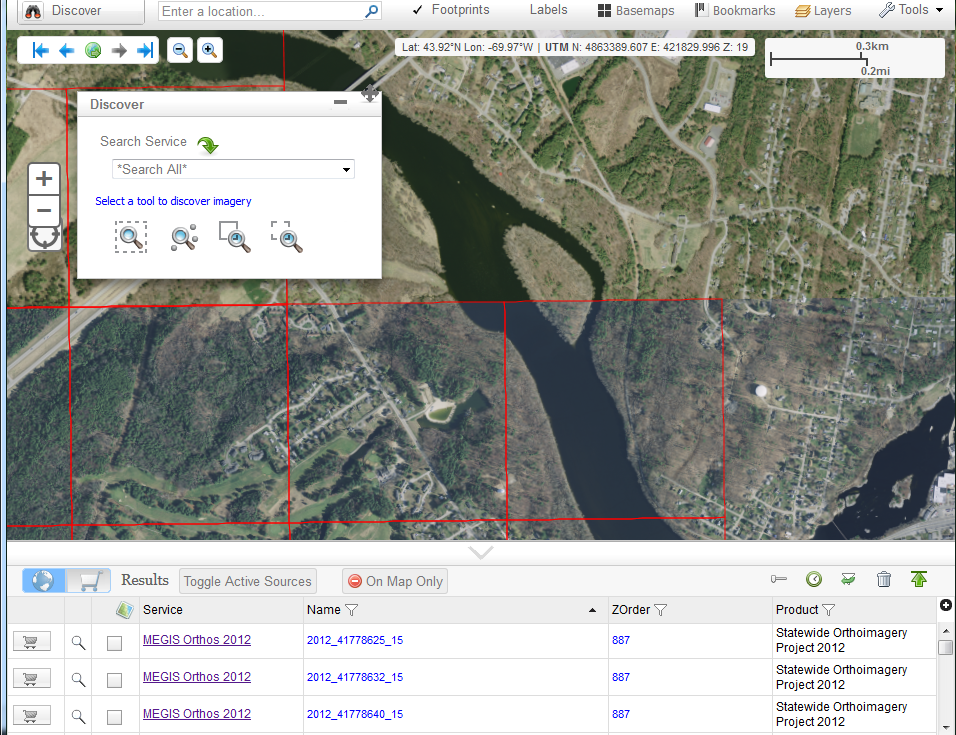
- Hovering the mouse over a table record will highlight the image on the map.
- Clicking the checkbox in the table will also highlight the corresponding image on the map.
- Clicking a table record will display a popup on the map showing the image location and other information.
- Clicking the magnifying glass icon on a table row will zoom the map to that image.
- Clicking the image name on a table row will pan the map to that image.
- Clicking on the image itself (on the map screen) will display information about that image. If several images cover the clicked location, information will be displayed for each of them. Clicking the shopping cart icon in the information popup will put that image into your shopping cart.
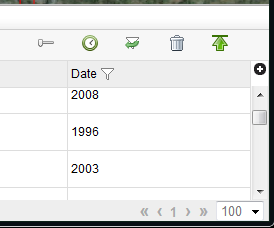
Filtering Results (optional)
By default, a search will show all images available for the search area. Users can filter their searches based on a criteria. For example, a user might only want to discover images for a specific year. This can be accomplished by filtering the results.
In this example, we will use filtering to select images for the year 2013.
First, select images using one of the methods described earlier. When the Result Table opens, notice that the Date column contains results for several different years:
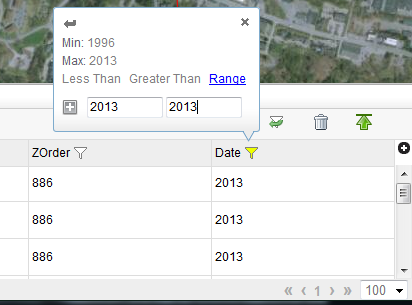
Click on the filter icon next to the "Date" heading. The filter dialog will appear. Notice that there aer options for Less Than, Greater Than, or Range. Since we only want images for the year 2013, we will click the Range option, then type 2013 in both boxes, then press Enter on your keyboard. Notice now only images from the year 2013 are selected:
Click the Remove Filter button ![]() on the result table to return all previously selected records.
on the result table to return all previously selected records.
Downloading Data
Image tiles may also be downloaded to your computer. Click the shopping cart icon for each image you want to download. The shopping cart will show a green dot when you click it.
When you have selected all of the images to download, click the shopping cart icon on the top border of the table. The table will now display only the images in your cart. If you need to display all the records again, click the globe button.
With the shopping cart view selected, click the Checkout button. The checkout popup will appear:
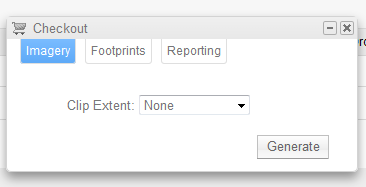
With the Imagery tab selected, specify a clip extent if desired, then click the Generate button. You will now be able to either download all of the imagery in a zip file, or you may select individual files to download.
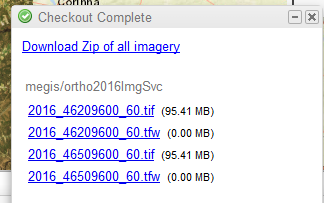
To download all the selected imagery, click "Download Zip of all imagery". The popup will indicate that it may take a while. When the zip file is prepared, click Zip Download:
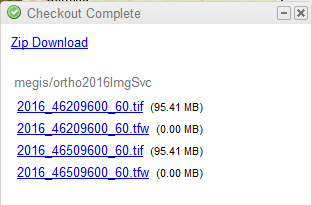
You will be prompted whether to save the file or open it in a program. Most likely you will want to save the zip file. If you choose to download individual files, click the link for each file. You will be prompted so save or open these.
NOTE: Occassionally, the following error message will be displayed when attempting to download selected imagery: ![]()
This mainly appears to occur when using Internet Explorer. If this message is displayed, click the Download link again. Often downloading will process on the second attempt. If the error message displays again, either download each selected image individually, or use a different browser.
Other Checkout Options
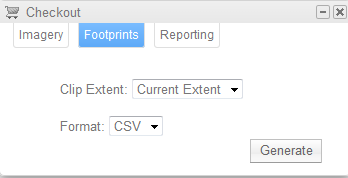
The Footprints tab allows you to download the footprints of the selected data, either in shapefile, CSV, or KML:
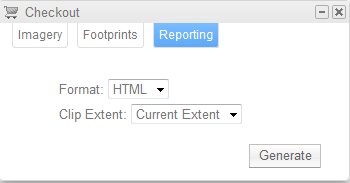
The Reporting tab prepares a map of the data, with a table at the bottom of the page listing the selected data. Reports can be output in HTML or PDF format.
Clearing Results
Click the Clear Results button ![]() to remove all previously selected images.
to remove all previously selected images.